
Ken Dickson, Ontario Science Centre, Canada
http://www.OntarioScienceCentre.ca/
Abstract
This hands-on workshop won't focus on *why* or *what* a podcast is. (There are other Museums and the Web sessions that'll take care of that.) Here, we're going to actually make one. The host of "The RedShift Report" (search for us on iTunes!) will create a podcast from start to finish. We'll go through:
- Recording the audio
- Editing and mixing the recording
- Encoding an MP3 file
- Authoring the XML feed
- Listing your podcast so that others can find it
- Listening to the finished product
By the end of the workshop, the only thing left for you to figure out is the topic of *your* museum's first recording.
Keywords: podcast, mp3, audio, xml, iTunes
How To Create A Podcast: Step-By-Step.
What’s A "Podcast"?
Well, first off, despite the word that has come to popularize them, you don‘t need an iPod to listen to a podcast!
At the end of the day, a podcast is simply an audio file that you can download and listen to on your computer or MP3 player. If you have an iPod, it‘ll work. If you don‘t, Windows Media Player, iTunes, or any number of other software applications can play them too. Basically, if you‘ve ever downloaded music on your computer, you likely can listen to a podcast.
There are podcasts available of interview programs. There are podcasts of live events and audio essays. There are podcasts of comedy shows… podcasts about music…
A podcast is like a radio program of sorts, but one that you or anyone with a computer and a Web site can make and distribute on your own.
So, Is Every Audio File A Podcast?
Nope! But the difference between a podcast and other audio files isn‘t the file itself, or even its content.
Typically, the audio file that comprises a podcast is a standard MP3 file, the same sort of file that‘s commonly used on the Internet to save and download music.
(While some podcasts are instead encoded as AAC or WMA files to take advantage of additional features that can be created using those file formats, doing so limits the number of devices - and ultimately listeners - who can enjoy the program.)
The difference is that to be a podcast, in addition to the MP3 file, you need to list it in an RSS file and make that RSS file available for download from your Web site as well.
I‘ve Just Learned "Podcast". OK, So What‘s "RSS"?
Simply posting MP3 files on your Web site would require that visitors return to your site periodically to see if you‘ve posted a new one.
That works, but what‘s special about podcasts is that with the right software, they download automatically to your visitor‘s computer every time a new one appears.
This automation is done by including details of your podcast in an RSS file and making that file available on your site.
RSS is an acronym for "really simple syndication". Details of them below, but simply, an RSS file is a text file that lists the file name of your podcast, the author, the subject, the date… basic information about the recording.
When a visitor "subscribes" to your podcast by adding the address of your RSS file into their podcast software, the software will periodically – automatically – revisit your Web site, download the RSS file and check if any new recordings have been added to it. New recordings are then automatically downloaded.
The benefit to podcasters is that the audience returns day after day, episode after episode, so long as they keep your RSS file listed in their software.
The benefit for visitors is that they can simply check their podcast software whenever they‘re ready to listen to a podcast and it will have available all the latest content downloaded and ready to play immediately. To quote the Wikipedia:
Podcasting's essence is about creating content (audio or video) for an audience that wants to listen when they want, where they want, and how they want.
How About An Example?
At the Ontario Science Centre, we‘ve chosen to start podcasting by creating a weekly five-minute "question and answer" show.
Truth be told, even before we started encouraging visitors to send in questions, they were anyway. In the past, a staff scientist would research and prepare an answer and email it back to the visitor.
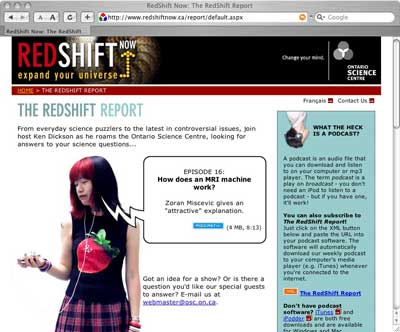
Fig 1. The RedShift Report http://www.redshiftnow.ca/report/
On The RedShift Report we take those same questions, but instead of e-mailing back answers, we now bring the scientist and a host together and record a short interview between them where the question and its answer are explained.
Basically, without a lot of additional work, we‘re doing much the same as we did in the past. Only now, it‘s to an audience of thousands, instead of one-to-one.
Enough Explanation. Let‘s Make One!
Just to review where we‘re at, here are the steps involved:
- Start with an ordinary MP3 file.
- List that MP3 file in an RSS file.
- Make both available on a Web server.
- Encourage visitors to "subscribe" to the RSS file.
To make the MP3 file, there are a number of free and low-cost audio recording packages available.

Fig 2: Audacity icon
If you are working on a Macintosh, Apple‘s "GarageBand" (http://www.apple.com/ilife/garageband/) has recently become a popular choice; however, the free "Audacity" is available for both Macintosh and Windows (and other) platforms and works equally well (http://audacity.sourceforge.net/).
The following describes the recording process using Audacity. While the buttons and menu options may change depending on the software and platform used, the process is pretty much the same.
1. Record The Audio.
Plug a microphone into your computer and open Audacity. With everything connected, there should be a display of the "levels" showing on the right.

Fig 3: Audacity toolbar with "levels" display circled
As you speak into the microphone, the level should move back and forth. The best sounding recordings comes when the level comes as near as possible to the far end of the graph but doesn‘t touch it.
You may need to adjust the microphone, switch to a better one, or simply alter the recording volume to make this happen. It will likely take a lot of trial and error!
With the format of The RedShift Report being a one-on-one interview, we typically set up two microphones, one on the scientist and one on the host. Some folks speak more softly than others; two microphones allow us to make one voice louder or softer as necessary.
Once the levels are set, press the red "record" button, and start talking!

Fig 4: Audacity toolbar with "record" button circled
Don‘t panic. Don‘t rush. And don‘t worry about mistakes (too much). Of course, it‘s great if you can get it all right the first time, but if someone flubs a line or needs to make a correction, you can edit the recording afterwards.
Once you‘ve recorded the audio, press the "record" button again to stop recording and save the resulting file.
At The RedShift Report, we‘re almost at the point where a five-minute recording takes five minutes to record. For the first few episodes, though, there were lots of flubs and "ums" and "ers" and we‘d be recording about twice as much as we ended up using. Fortunately, that"s where editing comes in.
2. Editing: Make It Sound Good!
Once you"ve completed your recording, you"ll end with a long audio track. If you"ve recorded with one microphone, you‘ll likely have one squiggly line. If you‘ve recorded with two microphones, you‘ll have two.

Fig 5: Audacity displaying a recording from two microphones.
The scientist has is the line on top, the host is the line on the bottom. By looking at the gaps in one line vs. the other, you can "see" where one person stops talking and the other begins.
Click the green "play" button to listen to the result. To play from someplace other than the start, simply click anywhere on the track before clicking "play".

Fig 6: Audacity toolbar with "play" button circled
As the track plays, a green progress bar slides across the top indicating the current position. If you hear a flub, press the stop button, and then drag your mouse across the offending area to select it.

Fig 7: Audacity with an area of the recording selected
With an area selected, click the Edit menu and select Cut. Your selected area disappears.
Depending on how much "extra" material you captured during the recording process, editing this way can be a really quick or really excruciating process… but…
At The RedShift Report, we‘ve found it best to be succinct, be upbeat, and keep a variety of "sounds" on-air. Listening to talk-radio, you don‘t get many examples of long speeches, monotone voices, or rustling papers. During the editing process, you have the opportunity to take out and shorten up such things. The idea isn‘t to remove content – it‘s to ensure the focus remains on the core ideas you‘re trying to convey.
It can be excruciating work, but taking the time to make the edit right makes for a program that‘ll be appreciated by the widest possible audience.
3. Mixing: Add music!
In order to make The RedShift Report feel more like a "real" show, we had a talented staff member record an intro theme for it. For fun, we also tend to include a few sound effects and clips from other recordings when mixing an episode.
Audacity lets you "layer" different sounds on top of one another. In fact, during the recording process, if you stop recording and start it again in the same file, you can see Audacity automatically create a new layer to contain each additional recording.
To add a new sound into your recording, select the Project menu, then Import Audio… and choose your file.

Fig 8: Audacity with many different sounds imported
Audacity will create a new layer containing the sound you just imported. Just as you did with the original recording, you can now edit the sound by selected and deleting areas to suit your needs. (To the left of the clip, there‘s a small Solo button you can click on. When it‘s selected, Audacity will play only that one sound when you hit the play button.)
Two other tools in Audacity now become important.
The Envelope tool allows you to change the volume of different parts of the recording. If you want one sound to fade out, or another to fade in, adjusting the envelope allows you to do so.

Fig 9: Audacity toolbar with "Envelope" button circled
Click the Envelope button on the toolbar. (It's indicated with two up-and-down arrows pointing at a line.) Each layer in your sound file will now be shown with a thick blue bar across the top and bottom of it.
With your mouse, you can now grab and drag the blue bar higher or lower. Dragging higher makes the sound louder; dragging lower makes it softer. To make something fade out, click the blue bar at the end of a clip and drag it down, right to the bottom. Then, a little bit back from the end, click the bar again and drag it higher. What you should see now is your clip staying loud until just near the end, at which point it descends down to a low volume. In the example below, we‘ve done this twice: once so that the clip gets softer in the middle, then a second time so it becomes louder at the end.

Fig 10: Adjusting the envelope in Audacity
The Time Shift tool allows you to move different clips back-and-forth. (It‘s in the toolbar and looks like a back-and-forth arrow.)

Fig 11: Audacity toolbar with "Time Shift" button circled
Click the button in the toolbar. Once selected, you can then click and drag your clips back and forth in time. This way, you can have the music start at the beginning and be followed by your voice recording.
Continue editing, enveloping and time shifting your recording until it sounds the way you want.
A five-minute episode of The RedShift Report can take an hour or two to edit and mix, depending on how complicated the sounds we‘re incorporating into it. Typically though, it can be done in about half that time.
4. Encoding: Export and Compress.
You‘re now almost finished creating the MP3 file! Unfortunately, we can‘t quite do the last steps in Audacity. So…
From the File menu, select ‘Export as WAV…" and give a file name. Once your WAV file has been saved, we‘re done with Audacity.

Fig 12: iTunes icon
For the encoding process, iTunes is probably the easiest program to use (http://www.apple.com/itunes/download/). It‘s available for both Windows and Macintosh computers. (It‘s free too!)
While it can do a whole lot more, for our purpose it‘s just to take Audacity‘s WAV file and from it create the final distributable MP3 file.
Open iTunes and select the Edit (or iTunes) menu, then Preferences. Here, we need to set iTunes so that it creates MP3 files at the size we need. From the preferences, click the "Importing" tab, then:
- MP3 encoder
- 64 kbps (mono)
- 44.100 kHz
Click "OK".

Fig 13: Adjusting preferences in iTunes
Depending on the content of your show, you may wish to adjust the 64 kbps to a higher – even stereo – value. Different settings may make your resulting file sound better; they‘ll definitely make it larger. As The RedShift Report is primarily talk, 64 kbps (mono) seems to be a good trade-off between the two: quality and file size.
Back in iTunes, drag your WAV file into the main window.
Right click it and choose "Convert selection to MP3".
Once the process has completed, right click the new file in iTunes and select "Get Info".

Fig 14: Adjusting info in iTunes
Here, you can fill in details about your MP3: name, artist, album, genre, etc. This step isn‘t necessary, but for visitors who play your MP3 on their computer, this will control what is displayed in their player while listening to it. Click "OK".
Drag your file from iTunes onto your desktop.
You‘re done! (Creating the MP3 file, that is.)
This is the file you can upload to your Web server, e-mail to your friends, and share with the world.
Are We Done Yet?
The review from earlier looked like this:
- Start with an ordinary MP3 file.
- List that MP3 file in an RSS file.
- Make both available on a Web server.
- Encourage visitors to "subscribe" to the RSS file.
We‘re done the first bullet. The last three are much easier.
Create an RSS File
They may look intimidating, but RSS files are simply text files, so can be created in Notepad, SimpleText, or any other editor you prefer.
If you‘re curious about the details, complete specifications of the RSS file format are available at: http://blogs.law.harvard.edu/tech/rss
For podcasts, Apple (and their iTunes program) have a few other items you can add into your RSS file too: http://www.apple.com/itunes/podcasts/techspecs.html
There‘s a lot more detail there though than you‘ll likely need at the start. In fact, the easiest thing to do is to simply take a completed RSS file and modify it. Here‘s The RedShift Report: (http://www.redshiftnow.ca/report/rss.xml.aspx)
The basics go like this. Replace the text in bold:
<?xml version="1.0" encoding="utf-8"?>
<rss xmlns:itunes="http://www.itunes.com/DTDs/Podcast-1.0.dtd" version="2.0">
  <channel>
    <title>Title of the show</title>
    <description>Description of the show</description>
    <itunes:summary>Description of the show (again)</itunes:summary>
    <itunes:author>The show‘s author, i.e. Ontario Science Centre
    </itunes:author>
    <language>en-ca</language>
    <link>URL of your Web site</link>
    <pubDate>Date of the most recent episode, i.e. Fri, 3 Feb 2006
    08:00:00 EST</pubDate>
    <lastBuildDate>Date of the most recent episode, i.e. Fri, 3
    Feb 2006 08:00:00 EST</lastBuildDate>
    <WebMaster>Your email address</WebMaster>
    <category>Category of your podcast, i.e. Science
    </category>
    <itunes:owner>
      <itunes:name>Your name</itunes:name>
      <itunes:email>Your email address (again)
    </itunes:email>
    </itunes:owner>
    <itunes:explicit>Does your podcast include explicit content?
    i.e. no</itunes:explicit>
    <itunes:link rel="image" type="video/jpeg" href="URL of an icon for your
    show">Title of the show (again)</itunes:link>
  </channel>
</rss>
Save your file with an .XML extension. For each new episode of your podcast, you‘ll need to edit the XML file and add a new piece:
<item>
	<title>Title of the individual episode</title>
	<link>URL of your Web site</link>
	<author>The episode‘s author, i.e. Ontario Science Centre</author>
	<subject>Subject of the episode, i.e. EPISODE 10</subject>
	<pubDate>Date of the most recent episode, i.e. Fri, 3 Feb
	2006 08:00:00 EST</pubDate>
	<description>Description of the episode</description>
	<enclosure url="URL of the MP3 file" length="File size of the
	MP3 file, i.e. 3453842" type="x-audio/mp3" />
	<itunes:duration>Length of the episode in minutes:seconds, i.e. 8:13
	</itunes:duration>
</item>
Add this new piece between the </channel> and </rss> lines and save the file.
Each time you add an episode of your podcast, simply add a new item to the file to make it available to your visitors.
To ensure you‘ve completed the file correctly, place it on your Web server and submit the URL to: http://feedvalidator.org/
It‘ll let you know of any issues.
With a valid RSS (XML) file, and the MP3 file we completed earlier, you‘re done! Place both on your Web site, and you‘re all set.
Get Subscribers!
Of course, even the best podcast is no good without an audience.
Linking to the podcast from your own Web site is certainly the way to hit your target audience, but a wider audience can be achieved by submitting the URL of your RSS feed to any number of (free) podcast directories.
While it may seem that there are as many directories of podcasts as podcasts themselves, (take a look at http://www.podcast411.com/page2.html for a few examples!) there are a few that are more "popular" than others.
Apple‘s iTunes has, far and away, the most popular directory:
https://phobos.apple.com/WebObjects/MZFinance.woa/wa/publishPodcastiPodder.org also has an excellent listing:
http://www.ipodder.org/directory/4/podcasts/categoriesHow many directories you submit your RSS feed to is up to you: the end goal though is to encourage folks to subscribe by adding the URL of your feed to their podcast software. As the software will regularly access your Web site and download the RSS feed to see if any new podcasts are available, a podcast you release one night might have hundreds of downloads by the next morning - not as the result of humans visiting your Web site and downloading it, but because their podcast software has automatically done it for them behind-the-scenes.

Fig. 15: Downloads of The RedShift Report, January 2005.
We typically make new episodes of the RedShift Report available on a Friday night. By Monday morning, about 400 downloads of the MP3 file typically go out.
You Did It!
With an MP3 and RSS file on your Web server and your podcast submitted to a directory, you‘re now a podcaster! For more background, check out: http://en.wikipedia.org/wiki/Podcast
(Wikipedia?? What‘s a wiki?)
Cite as:
Dickson K., Podcasting 101, in J. Trant and D. Bearman (eds.). Museums and the Web 2006: Proceedings, Toronto: Archives & Museum Informatics, published March 1, 2006 at http://www.archimuse.com/mw2006/papers/dickson/dickson.html