Katie Dance, Tate, United Kingdom and Stephanie Pau, SFMOMA, USA
[Additional workshop instructors Peter Samis and Tim Svenonius, SFMOMA, USA]
Abstract
This hands-on workshop will show how simple and cheap it is to create high-quality, media-rich content for on-line distribution. Workshop attendees will be taken through a simple 5-step cycle in how to create and launch an artist's video interview, in just a day.
The steps:
- Prepare questions (tailor standard questions)
- Film interview (equipment choices, lighting and audio tips, style and technique)
- Edit and encode video (software, process and quality)
- Sign off with artist (copyright and approval)
- Launch and link (promote and enjoy).
Participants will be encouraged to make a video interview at the conference to see just how easily vodcasts can be created. The workshop will enable them to return to their organisations with the skills and confidence to create and distribute digital video cheaply, quickly and in-house.
Keywords: artists, interviews, video, in-house production, vodcast, podcast
Background: What is Vodcasting?
Video podcast (sometimes shortened to vidcast or vodcast) is a term used for the on-line delivery of video on demand video clip content via Atom or RSS enclosures. The term is an evolution specialized for video, coming from the generally audio-based podcast and referring to the distribution of video where the RSS feed is used as a non-linear TV channel to which consumers can subscribe using a PC, TV, set-top box, media center or mobile multimedia device). Wikipedia
Strictly speaking, vodcasting is video distributed on-line, via an RSS feed. In this workshop we will first focus on the creation of the video, and include other on-line forms of distribution, such as streaming, and offering the video for download directly from a Web site (i.e. not necessarily via an RSS feed). Secondly, we will tackle how to send videos over an RSS feed - essentially providing on-demand video - or a “true” vodcast.
The benefits of RSS feeds:
- Visitors to your Web site can subscribe once and receive all future updates.
- Visitors can manage their video; for example, using iTunes.
- It makes good use of bandwidth because the video can be downloaded in ‘downtime’ (ie while you are away from computer).
The benefits of streamed video:
- It is harder for people to copy your video content and abuse copyright.
- It is quick to load if the video is streamed ‘progressively’; i.e. visitors do not need to wait for the whole movie to download before viewing it; rather, the video can be viewed as it is downloaded.
- One disadvantage is that you can only watch the video content when on-line.
Benefits of downloadable video direct from your site:
- This method brings visitors back to your Web site for new content, so offers a good marketing opportunity for you to show them other material at the same time.
- Once downloaded, the video can be (re)watched off-line at any time; for instance, on a PDA or portable media devices, on a train or in the gallery. This can also help get around firewall issues encountered in some organizations.
Workshop Introduction
This is a practical workshop which shows how to create a vodcast in a day. It is important to note that it is easy and often worthwhile to spend more than a day creating a vodcast, but it is not always necessary. A day can be enough to create a short, basic clip, as we will show you today – in the hope that this will give you the confidence to start making vodcasts yourselves and relatively quickly.
Step 1: Conceptualising And Scripting – The Importance Of Preparation
It is advantageous to conduct an interview based around something that is already happening in the gallery or exhibitions space, as it will provide you with a topical subject to discuss with your artist or interviewee. Check your institution’s events calendar and exhibition programme to see what opportunities there are for filming. The content you create will be great additional media-rich content to sit on your microsite or exhbition page.
i) Consider your audience - are they the general gallery visitor or are they more scholarly?
- Consider their level of knowledge and expertise.
- Consider their attention span.
ii) Consider your subject matter; for example, the artist and their work.
- If interviewing an artist, are you going to discuss a particular show?
- Do you want to cover their work retrospectively, or will you focus on 1 or 2 works?
iii) Prepare your questions and tailor standard questions where possible.
- Make sure you research the artist and their work or the show that you will be discussing.
- Pick out any specific issues relating to their working method; for example, do they work alone or collaborate? Do they usually work in a certain way or with a particular medium?
- Always prepare more questions than you anticipate asking in case you have to unexpectedly abandon certain questions during the conversation, but try to keep your questions relatively simple and allow the artist to talk freely.
- If you are interviewing for a group show, use the same questions (as far as sensible) for each artist (when relevant), for continuity and comparison of views.
- Similarly, if you are going to conduct a series of interviews over a period of time, you can tailor some standard questions each time to suit your needs.
These are a set of possible questions you could consider using:
- Can you talk us through/describe these particular works?
- Can you tell us about your creative process and how you develop ideas for new work?
- What processes were involved in actually making these pieces?
- Is the ‘process of making’ important to you?
- Is the specificity of medium important to you?
- Are titles important? What is the significance of them?
- Is the actual materiality of your work central to your practice? Why?
- Why are you sometimes drawn to working with different mediums?
- Is there an overarching theme that underpins your practice?
- Can you tell us about your latest works and more specifically, how they relate to your other works?
- Can you explain why ‘xx xx xx’ is integral to your practice?
- How important is the audience’s experience in relation to your work?
- What other artists have influenced you?
- What are you currently working on?
iv) Consider who should conduct the interview:
Who is the best person to conduct the interview? It might be more relevant for you to work with a colleague in another department; for example an interpretation curator, a conservator, or an exhibition curator.
v) Consider where you will conduct the interview:
Note: it is worth considering the equipment you will be using before you consider possible locations. For example, will you be using the built-in microphone on your camera, or a radio transmitter microphone? Are you going to rely on natural lighting, or do you have a portable light and/or light reflector?
- Try to get as interesting a location as possible - one that will be visually interesting but also relevant. Good examples are the artist’s studio, or the actual exhibition space within the gallery, (it’s great to see the works in situ in the background as you talk about them, as the video viewers will feel a sense of ‘being there’ even if they cannot make it to the physical gallery). Also, when these interviews are archived, they will also provide a useful document of the occasion.
- Always conduct a quick rece of the location before you meet the artists and shoot the interviews. Think about where you want them to stand and where the best light is situated. The more prepared you are when you meet them, the more confident you will make them feel.
- Make sure you check for obvious things such as the noise levels. If an exhibition is being set up, you might want to conduct the interview at a time when you can arrange for there to be less noise; for example, during lunch breaks. If the artist works using time-based media, you may need to arrange for the artwork to be switched on and working. If you intend to use a public space as your backdrop, you might want to check that there will not be a large school party decending on the space as you are about to shoot your interview.
- If you are unable to use an exhibition space or artist studio, or if it is not relevant to do so, again try and find an interesting location with an interesting background. You might want to re-arrange a meeting room in advance to make it look more interesting.
Step 2. Film Interview (Equipment Choices, Lighting And Audio Tips, Style And Technique)
Now that you have arranged where you want to conduct your interview and you have fixed a date and time with your artist or interviewee, you want to shoot the interview. One obvious tip is to check well in advance that your equipment is working correctly and that all your batteries and any back-up batteries are fully charged. If you are using lighting equipment, check that the light bulbs have not blown, also that your microphone is not faulty. Allow time for someone to fix damaged equipment if need be, or for you to go out and buy a replacement.
i) Consider whether or not you want the interviewers to be present in the video; e.g. do you want to see them or hear them?
It can be less complicated when you come to edit, not to have the interviewer visible or heard. It means you only need to worry about one audio level and you can focus on your subject. It can be quite difficult for your video cast viewer to hear clearly a question that is being asked off screen. However, you might decide that it is relevant to show both your interviewer and interviewee in the same shot. Beware that you may find it harder to get the audio levels equal. I would advise that you keep it as simple as possible:
- Record your interview focusing on just the artist, then later when you edit the interview, insert the questions as text captions either by using the Insert Text option in iMovie, or by creating your own text inserts in Photoshop. This method is a bit like the old silent movies, and it does have its benefits. Accessibilty-wise you will reach a greater audience. If you have the budegt and the time, you might want to add subtitles throughout your entire interview.
Other more complicated filming options include:
- Capturing the interviewee in your camera’s viewfinder and having the questions heard off screen.
- Capturing the interviewer asking the questions as a cut away shot, and then cutting to the interviewee answering the question.
ii) Remember to consider the shooting style options, which include:
- Letterbox, widescreen, 16:9
- 4:3 (standard television size) UK
Stylistically, it will look more ‘filmic’ if shot in Letterbox, widescreen, 16:9.
iii) Consider how you want to compose your film in the camera’s viewfinder:
- It is a good idea to position the artist roughly face on and have the interviewer (the person asking the questions) sitting or standing, whichever is most appropriate, next to the camera, but off camera, so that the artist is looking at the interviewer and just off left or right of the camera’s lens. This will depend on which side of the camera the interviewer is sitting. It means that the interviewee is not directly addressing the viewer, and this often looks best on camera.
- Ideally, position the camera so that the artist or interviewee is looking into the largest space in the camera shot, so if the artists are positioned to the left of the camera shot, frame them so they are looking into the right of the shot, the largest space.
iv) Consider your lighting options:
Natural light:
- If there is enough natural light (most digital cameras will have an automatic aperture control, which means they will adjust themselves to how much light is coming through the camera’s aperture for you), this is the easiest and cheapest option. Have your artist or interviewee facing the natural light source.
- You can hold white paper, card or aluminium foil under the face and neck of the artist or interviewee (out of shot) to reflect as much natural light as possible back on them.
Additional light:
Even with a small budget you can achieve better results, so it is worth considering buying cheap lighting.
- You can buy fluorescent shop lights which are cheap, give off a good ‘natural white light’ and look soft on screen. They have the added bonus of not getting too hot for your interviewee who has to sit under them. Note that halogen lights can get very hot!
- You could buy a cheap photographic light and stand, such as the Tri-lite by Bowens. This has a fluorescent lamp with around 220-240 volts and a maximun wattage of 3x30. A light like this would serve you well. Two lights would serve you very well, but if you cannot afford two, buy one and consider buying a reflector, which is cheaper and almost as effective.
- It is better to reflect light on to your subject, either off a wall or the ceiling. Play around, positioning the lighting in various places to get the best results. Ideally, do this before your interviewees arrive, but you will need to adjust the lights to suit their specific skins tones when they do arrive.
v) Consider your recording audio levels.
Three possible options:
The camera’s built-in microphone.
- As the name suggests, it is built-in to the camera and is usually quite adequate, but you will need to be positioned quite near to your subjects to pick up what they are saying. On-line, audio is of a high importance to the viewer and probably more so than the video footage.
- Be aware or the fact that not only will this microphone pick up what your interviewee is saying, but it will also pick up any sound around them. If you are in a busy gallery environment, you may pick up unwanted peripheral noises. It is hard to remove these sounds in post production, so do not make the mistake of relying on doing this. If you do have to use the camera’s built-in microphone, keep close to your subjects (a head and shoulders shot ideally) and ask them to speak up if you need to.
Lavaliere microphone
- Worth investing in, this mike clips onto the lapel of your subject and wires directly into the camera; it gives you a much higher quality recording than the onboard camera mic.
- With lavalieres, be attentive to hair noise (long-haired subjects), and face scratching noise (beards can be surprisingly loud!).
Wireless transmitter microphone
- Again worth investing in, this mike is comprised of a wireless microphone transmitter and a wireless reciever. The microphone clips onto the lapel of the interviewee and is wired up to a transmitter box that can sit in their back pocket. Sound is then transmitted via wireless VHS radio to the receiver, which sits on top of the camera and is connected to the camera via the ‘in put’ microphone socket.
- This option allows greater freedom of movement and means you can have your subjects heard over any peripheral background noise. They can walk around and away from the camera and still be heard. The sound quality is also richer and of a higher quality.
- Always record one minute of room tone either before or after your interview in case you need blank audio to cover up pauses, etc.
Another piece of essential kit:
- Invest in a good sturdy tripod for your camera. The heavier the better: it is a very worthwhile investment.
Once you have shot your interview, you need to get the footage on to your computer to edit it.
Step 3. Edit And Encode Video (Software, Process And Quality)
i) Begin by importing your footage:
- Open iMovie and name and save a new project. Give your project a name that will help you to retrieve archived footage later. (Also label your DVCam tapes well if you are using DVCam. Consider including the project title, the artist’s name, the interviewee, the location, the date it took place and the duration of the finished edit in minutes and seconds. Consider including this information in your video credits too).
- Connect your video camera to your Mac with a WireFire lead (it will say Camera Connected) and copy your footage over from the camera into iMovie HD (as you import your video interview footage from a standard high definition camera via FireWire into an iMovie project, it will automatically divide your video footage into individual clips).
- Click on Import to import the footage - you might want to just play the footage in the Preview Window first, to select the footage you want to import into the Mac. Doing this will save you some valuable time later.
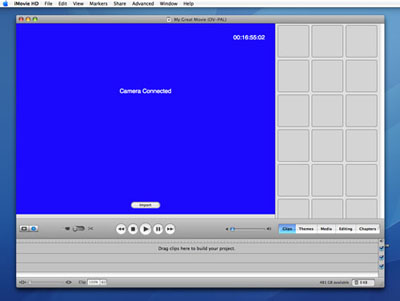
Fig 1: Importing footage in iMovie
- Click on Import again to stop importing the footage – you might want to fast forward to another section.
- Once imported, you can arrange the clips in any order by dragging the clips from the Clips Pane into the Clip Viewer/Timeline at the bottom of the window. Do not worry about being accurate at this stage as you can re-arrange the order later if you wish.
- Click on a clip in the Clips Pane to view it in the Viewing Panel (press play to view it).
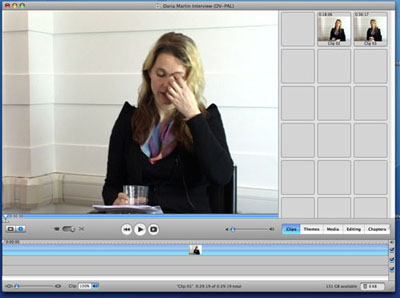
Fig 2: View clips in the Viewing Panel
- Double click on the clip in the Clips Pane to re-name it.
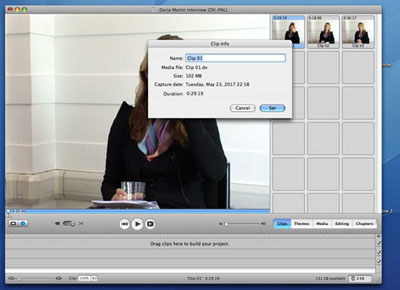
Fig 3: Re-name your clips
Note that you will spend a fair bit of time viewing your clips and selecting the footage that you want to use. It is worth cutting out the footage you do not want at this stage. Use the timeline frame counter to help you navigate through your footage. You can make a rough selection of edits that you think are suitable – then you might enlist the opinion of a colleague to review them and make further selections. They can use the Preview Window counter to pinpoint ‘in’ and ‘out’ points. One advantage of this is they do not need to be able to edit using iMovie; they can simply write down the numbers and hand them to you and you can then make the edits later.
If you have any unwanted clips, delete them or drag them into the trash (they remain retrievable until you delete the trash).
ii) Begin making your edit - 2 easy-to-remember ways to edit your footage:
- Cropping – Here you can either trim off footage that you do not want or you can select embedded footage you want to keep and delete the footage either side of it that you do not want to keep
- Splitting – Here you take a video clip and split it into two parts, keeping both if you want them. You might find that one segment actually answers two questions and you would like to divide that segment into two parts and place them at different times in the video interview.
No doubt, you will probably find one technique that you prefer and use most.
iii) Cropping:
- Select your clip in the Clip Viewer/Timeline

Fig 4: Select your clip in the Timeline
- Hover your mouse over the scrubber bar (the blue bar directly under your large Preview Window); the crop markers will be visible (you have one for your entry point and one for your out point).
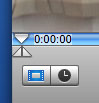
Fig 5: Crop markers for your in and out entry points
- Drag the left crop marker along the scrubber bar to find the exact location that you want your clip to begin.

Fig 6: Mark where you want your clip to begin
- Drag the right crop marker along the scrubber bar until you find the point where you want the clip to finish (your out mark). You can do this as many times as you need, and view the footage as you do to get the exact spot.
Note the footage you will be keeping will be in yellow on the scrubber bar. The footage you will be deleting will be in blue.
- Select Edit in the menu bar and Crop – this will delete the frames either side of your crop markers.
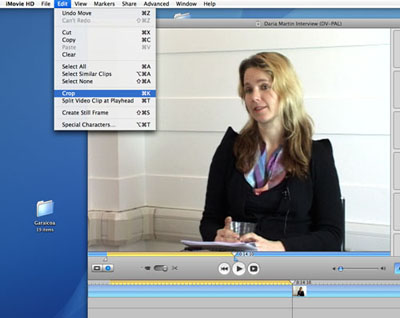
Fig 7: Select Edit in the menu bar and Crop
- Always view your crop straight away to make sure you have cropped correctly. If you make a mistake, you can go to Edit and Undo Crop. If the crop was a success, save it!
iv) Splitting:
- To split your footage, select your clip in the Clip Viewer/Timeline
- Hover your mouse over the crop markers (the blue bar directly under your large preview panel; the crop markers look like half triangles and sit just under the Playhead marker) and select the frame where you want to split the clip in two.
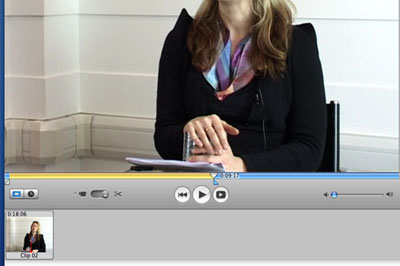
Fig 8: Select the frame where you want to split the clip
- Select Edit and Split Video Clip at Playhead, you will notice that there are now two clips and you can either delete the one you do not want or move it somewhere else in your timeline. It is advisable at this stage to re-name your two split clips.
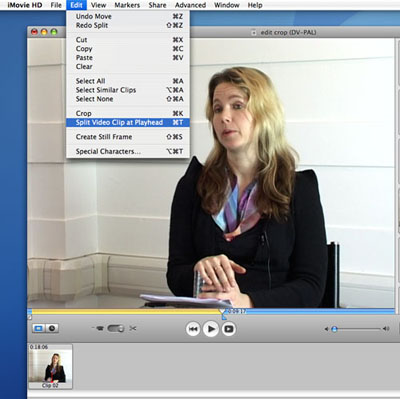
Fig 9: Select Edit and Split Video Clip at Playhead
When you play your video, the clips will appear as you have arranged them in the timeline. If you do not like the order, simply re-arrange the clips in the clip viewer, by dragging and dropping them where you want them. Remember, the order in which you filmed your interview does not have to be the order in which you present your video.
Also, remember to keep saving the changes you have made. If you want to view your audio in the timeline, go to the View menu and Show Audio Waveforms. This is useful if you want to see exactly where your sound starts and stops.
v) How to crop and delete frames embedded within a clip:
- Select a section of a clip in the Clip Viewer/Timeline by dragging the crop markers below the scrubber bar to where you want your clip to begin and end. Remember that the fames you will keep are in yellow.
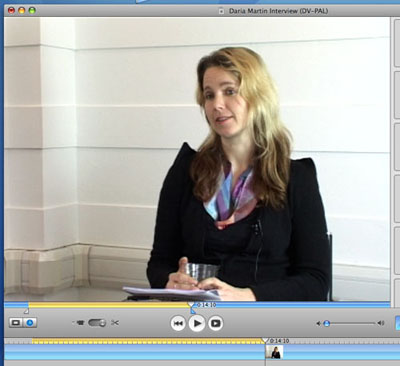
Fig 10: The frames you will keep are in yellow
- Go to the Edit menu and then select Crop or Clear to remove the section. You can use the arrow keys on your keyboard to move frame by frame through your footage, or hold down the shift key while pressing the arrow key to move 10 frames at a time.
vi) How to create your titles and credits:
You can do this in iMovie, using the various titles options available to choose from. However, I suggest that you create them in, for example, Photoshop, and then very simply import them into iMovie. The advantages are you will have more control over your style of font, and you will be able to fill the screen with a lot more text than you can in the text entry boxes offered in iMovie.
Creating credits and titles in iMovie:
- Select the first clip in your Clip Viewer/Timeline and then click Editing and the Titles button. You can select various titles, though most you will find unsuitable. Titles that bounce across the screen might be just too much of a distraction from your subject! Centered Title is a good general option.
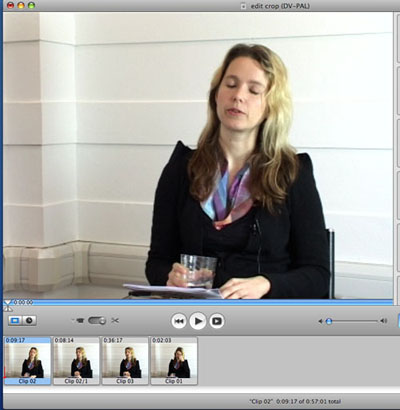
Fig 11: Select the first clip in your Clip Viewer/Timeline
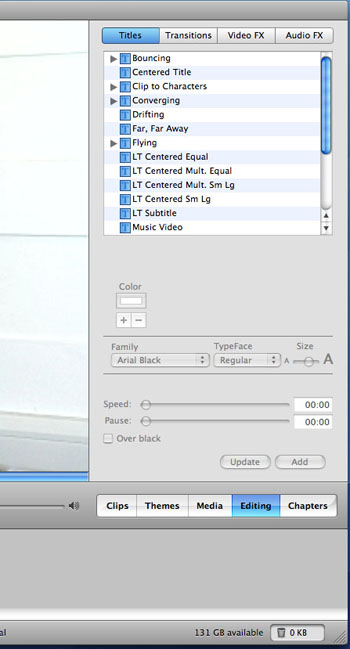
Fig 12: Select Editing and the Titles button
- Type your question text, credit text, copyright text, etc. into the text field box (again you will be restricted by the number of credits you can enter.)
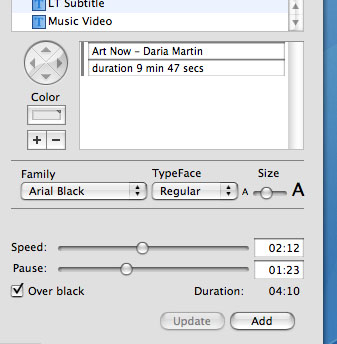
Fig 13: Type your text into the text field box
- If you want the credits to appear over a black background, select your title, choose your font size, etc., and then tick the Over black tick box.
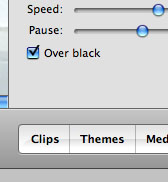
Fig. 14: If you want the credits to appear over a black background, tick the Over black tick box
- Click preview to view the title you have chosen in the Preview Window.
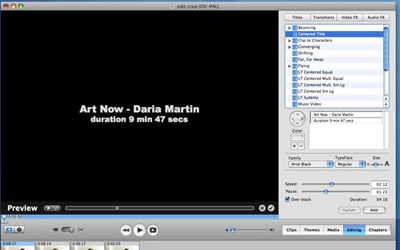
Fig 15: Click preview to view the title in the Preview Window
- You can change the duration that your credit shows using the speed slider. (You will be able to see your changes directly played in the Preview Window.) Remember to make sure you leave your titles and any other text, such as questions, on the screen long enough for your on-line audience to read them.
- You can change the size of the font using the font size selector. (You will be able to see your changes directly played in the Preview Window.)
- Drag your chosen title into the timeline; for example, at the beginning or your clips in the Clip Viewer/Timeline bar.

Fig 16: Drag your chosen title into the front of the timeline
- If you want to view all your clips together, one after the other, to get a feel for how the clips are working together, click around the grey area below the Playhead bar. You will see the blue bar change to show the clips separated by tiny line breaks. Click on an individual clip to view it in the Preview Window.

Fig 17: Click around the grey area below the Playhead bar to show the clips separated by tiny line breaks
Creating your own credits and titles in Photoshop and then importing them into iMovie is another option.
vii) Creating black blank spaces:
In iMovie:
- Go back to your Titles options.
- Select your Centered Title.
- This time, remove the text you entered in the text box.
- Drag this empty Title into the Clip Viewer/Timeline the same way you did for your captions/credits. This time you will simply have a black space. You can use these black spaces between clips to fade in and out of each clip.
- Reduce the duration of this inserted black clip by cropping it in your Preview Window the same way you would for any other clip.
- Increase the duration of this inserted black clip by copying it and pasting it next to itself. You can do this very easily using the copy / paste short cuts on your keyboard. Select the clip you want to copy – copy it – highlight the clip that sits just in front (to the left) of where you want the copied clip to fit into, and paste it in. The copied clip will now be to the right of the clip you highlighted.
viii) Consider adding cut-aways:
It is a good idea to add cut-away images if you are interviewing artists and you want to show good images of the work they are talking about. Cut-aways are also useful if you want to keep the audio but not the filmed footage, and you need an image to insert into the gap.
- in iMovie HD, you can access pictures in iPhoto and add them to your timeline.
You can also drag and drop images from anywhere on your hard disk into the iMovie HD timeline: iMovie HD will format the images to fit with the format of your video. You can change the duration they show on the screen by cropping the image clip as you would any clip. Similarly, you can extend the duration by copying and pasting the clip to make it twice, three times or four times as long.
- Return to your Clips menu.
- Drag and drop the image into your Clips Panel and then drag it into your timeline as and where you want.
Consider making a still image from a video clip:
You may have a clip that contains an image you want to use to illustrate your interview.
- Select the image in the clip using the Playhead marker.
- Go to the Edit and Create Still Frame. The still clip appears in the Clips Pane.
- Adjust the duration that the still image will appear - to increase or decrease how long a picture appears in the video, use the Duration slider at the top of the Photos pane and then click Apply.
At this stage, you might want to consider importing images from other sources such as image folders on your shared folders or images saved to your desktop
- Simply add images from your shared folders or desk top by dragging them into your time line.
ix) Consider adding transitions between clips:
This is useful for creating a smooth join between each clip. It enables you to fade in and out of shots and prevents sharp cut offs and abrupt edits. iMovie HD has a few different transitions, but the best suited here is a straight fade in and out between clips. Fortunately you can also add transitions between video clips and still images.
- Select your clip to add your fade in or your fade out (to apply the transition to or from) then click the Transitions button.
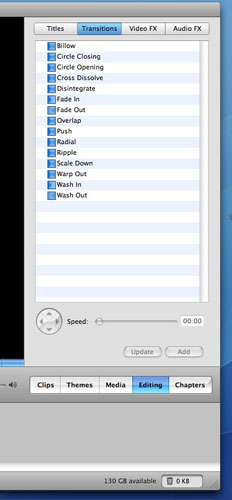
Fig 18: Click around the grey area below the Playhead bar to show the clips separated by tiny line breaks
Preview the transition in the Preview Window. You will see the transitions icon sitting in between the two clips.

Fig 19: the transitions icon sitting in between the two clips
- Speed up or slow down the transition using the speed slider underneath the Preview Window. Note that if you make a change to the speed of the dissolve, click update to save your change.
x) Remember to Save your footage and archive it:
It is very important to save your footage carefully (the original footage too) so that it can be re-used if need be. Save it by burning it to DVD (useful if you want to play it in the gallery space on a DVD player). One way of saving your video interview to archive is to send it back into the video camera and save it to a tape. This gives you a high quality copy for your archive.
- Insert a new, recordable tape in your camcorder.
- Switch the camcorder to VTR mode and connect it to your Mac via the FireWire lead (make sure the Playhead in your timeline is at the beginning of the video).
- Set it to Playback mode.
- In iMovie go to the Menu and select File and Share.
- Choose the video camera icon that appears along the top of the pop-up box.
- Click Share and the video is sent back into the video camera where it records it on the new tape.
This copy is recorded in real time, so your 6-minute interview will take 6 minutes to copy over to the tape.
You can burn a copy of your interview to DVD using iDVD.
- Click the iDVD button.
iDVD will allow you to add chapter markers to your video (this is useful if you want to separate the different questions asked during the interview). However if the interview or video is relatively short, you may not want to bother doing this.
- Move the Playhead to where you want the new scene to begin (the next chapter) in the timeline and click the Add chapter button.
Click the Create iDVD project button to burn a copy to DVD.
Step 4. Sign Off With Artist (Copyright And Approval)
- Always leave sufficient time to get the artist's approval before launching the vodcast. This includes leaving time to implement any changes that you agree on.
- The simplest way to get sign off is by posting the vodcast on a hidden or secure section of your Internet site and sending the artist the url. Before you do this, you should check that the artist is able to access the Internet and has the right software installed (eg Flash or Real Player).
- Another option (which can be time efficient if the artist is local) is to sit down with the artist and review the content together. Edits can then be made and approved immediately.
- Approval from the artist should ultimately be put in writing. However, an e-mail will usually do, especially if no artworks have been included in the footage; they could require additional clearances.
- A simple form can be created for this purpose, and ideally perpetual rights should be sought to ensure the content is available in the long term.
Step 5. Launch And Link (Promote And Enjoy)
Before you launch your new artist video on-line, you will need to encode it into a suitable video file. ‘AVS Video Converter’ is a very cheap piece of software ($20 to dowload it on-line). So assuming you have downloaded your encoding software onto your Mac here is what you do next to export your DV file, or QuickTime Movie file (.mov) in iMovie:
- Select File and Export
- Select Full Quality in the drop down and also select QuickTime and save it to a folder. Anywhere you choose is fine.
- Open AVS Video Converter (or equivalent) and upload your saved file.
Encoding settings (this example is for RealPlayer)
Narrowband:
In general on a Web site it is advisable to have one version optimized for a 56k modem, because stats show that 40 – 50% of your audience, (largely international) still access your site from a modem.
- Clip speed 24 kbps
- Audio Rate 8.5 kbps
- Frame rate 15 fps
- Frame size 240 x 180
Broadband:
Also provide a higher quality broadband version. Optimize for about 256k. That means that the lowest domestic version broadband can still view the video smoothly.
- Clip speed 225 kbs
- Audio Rate 44 kbps
- Frame rate 25 fps
- frame size 640 x 480 or 320 x 240
If there is a lot of movement and a complex background in the video, then a smaller frame size of 320 x 240 would be more suitable.
Next, you need to upload your files to your streaming server.
This involves two files:
- One, a .ra file, which is the audio/video file that you upload to your streaming server.
- The other, a .ram file, which is created in notepad and which links to the location of the .ra file on the streaming server. The .ram file will be uploaded to the ordinary server (i.e. where all the html pages are).
- If you want to put a link to the audio/video file from any html page, or if you want the audio/video embedded in an html page, you type the location of the .ram file into the html. Then when the page is accessed, this will automatically connect to the .ra file on the streaming server.
Here is a useful link to information on how to create a RAM file using notepad:
http://www.irational.org/radio/radio_guide/ramfile.html
To save a notepad file as a .ram instead of a .txt, when it says 'Save As Type' in the drop down box, select 'All Files' instead of the default 'Text Documents'; then, when naming the file, just give it the extension ".ram".
From Streaming to On-Demand: Create a “True” Vodcast for Your Museum
The previous sections outlined the steps for creating and establishing streaming video on your Web site. Yet you are still a few steps away from being able to claim the title of a true vodcaster. Only when you have sent videos over an RSS feed - essentially providing on-demand video - have you established a true vodcast.
Streaming or downloading video through the methods we have described thus far is a one-time event. You follow the link, you play the video, end of story. Vodcasting works on a subscription basis: you sign up for a vodcast, and each time a new episode is released, you are notified and can opt to have it streamed your way.
The technology behind vodcasting is identical to that which makes up podcasting. The only difference is that you are distributing video, rather than audio files. The key to vodcasting is to establish an RSS (Real Simple Syndication) feed, a page of instruction that can be read by iTunes (or other subscription programs). By preparing your movies properly and creating the right feed, you can offer your audience video on demand through an application familiar to us all: iTunes (version 4.9 or higher), a program that supports playback of local and streamed video.
How to go about creating and distributing a vodcast of your own:
The Skeleton Crew: A Bare Bones List of the Tools You Need to Get You Started
- Your video(s)
- Space on your institution’s Web server, or space on a hosted server to host your media
- Space to host the XML file that allows iTunes to access your video
- QuickTime Pro 7 (for compressing your movie to optimally play in iTunes)- this costs $29.99 and is available for download from the Apple Store Web site.
i) Create, Optimize and Export
The steps above outlined how to produce and edit your own media with the help of iMovie. Now that you have your media, you must optimize it for playback over a subscription feed:
- Open your iMovie film using the Export command and save the film in H.264 video codec format. H.264 is a relatively new video codec format and delivers stunning quality at remarkably low data rates.
ii) Compress your file
You need to compress the video so that it plays optimally over your vodcast feed.
- Open your film in QuickTime Player Pro 7.
- Choose Export from the File menu, and in the Save Exported File As dialogue box, select Movie to MPEG-4 from the pop-up menu.
- Click the Options button, and in the MP4 Export Settings select MP4 from the File Format pop-up menu.
- In the Video Format pop-up menu, select H.264. To keep your file size smaller, select a modest image size; for example, 240 x 180 frame size with a frame rate of 15 fps.
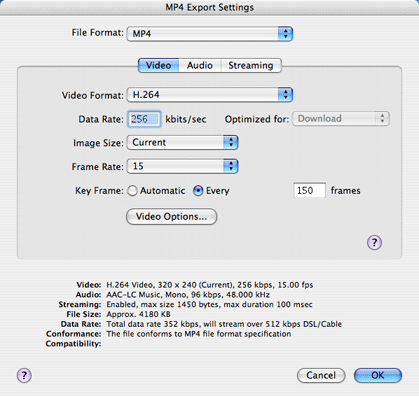
Fig 20: MP4 Export Settings
- Click the Audiotab and make sure that AAC-LC (Music) is selected in the Audio Format pop-up menu. Select a modest data rate from that pop-up menu (48 kbps, for example). You will save even more space if you choose Mono from the Channels pop-up menu and an output sample rate of 32.000 kHz.
- Click the Streaming tab to enable the Enable Streaming option.
- Click OK and then click Save in the Save Exported File As window to compress your video. Compressing the video could take quite a while if your video’s duration was long and the file is large.
iii) Put it on a server
Work with your Web team to create a ‘home’ for your films on the Web server. This is the directory in which you will drop your compressed movie files, and from which your movie will be delivered to the world.
If for some reason you are unable to host your own media there are a number of services that will host your videos for you. There are many free services, but most come with a few hitches such as limited file size capacity and/or the inability to keep your files private. However, you can easily find low-cost hosting solutions which offer both privacy and unlimited (or astronomically high) file capacity.
i) Some suggested hosting solutions:
- OurMedia (http://www.ourmedia.org) - Provides “free storage and free bandwidth for your videos, audio files, photos, text or software forever. No catches.”…Except that your video will be shared publicly with others.
- YouTube (http://www.youtube.org) - Free hosting, but everything you upload will be made public.
- Google Video (http://video.google.com) - According to Google’s Web site, this service allows you to "upload as many videos to Google Video as you like, without any size or length limitations." However, at the moment, they do not allow private video.
- Veoh (http://www.veoh.com) - There is no file size limit with this server. This is a P2P sharing platform where a short clip of up to 3 minutes is show-cased. Users then decide from that whether to download the rest of video.
iv) Create and Post your XML file>
The XML file you create will allow iTunes to access your film. Essentially there are two options to choose from:
i) Employ a feed generator to create the XML file.
- Feed Burner (www.feedburner.com)
- FeedBurner (www.feedforall.com) – A low cost program that takes the coding completely out of the process.
ii) Manually code your feed. To guide you, we have provided sample XML code below. Use the text as a model template and write your own code into a plain text (TextEdit or Notepad) document, replacing the example entries with entries that match your needs (for example, SFMOMA Video Casts should be replaced with the title of your vodcast feed. Save the file with the .xml extension - vodcasts.xml, for example - and your feed is ready to go!
<?xml version="1.0" encoding="UTF-8"?>
<rss
xmlns:itunes="http://www.itunes.com/dtds/podcast-1.0.dtd"
version="2.0">
<channel>
<title>SFMOMA Video Casts</title>
<description>Welcome to SFMOMA Video Casts, a series of illuminating interviews with artists, curators, and visitors as they respond to the work on view at SFMOMA.</description>
<link>http://www.sfmoma.org/education/edu_videocasts.html</link>
<copyright>© 2007 San Francisco Museum of Modern Art</copyright>
<docs>http://blogs.law.harvard.edu/tech/rss</docs>
<language> en-us</language>
<lastBuildDate>Thu, 1 Feb 2007 14:50:52 -0800</lastBuildDate>
<pubDate>Thu, 1 Feb 2007 14:50:26 -0800</pubDate>
<itunes:subtitle>SFMOMA Video Casts</itunes:subtitle>
<itunes:summary>Welcome to SFMOMA Video Casts, a series of illuminating interviews with artists, curators, and visitors as they respond to the work on view at SFMOMA.</itunes:summary>
<itunes:author>SFMOMA</itunes:author>
<itunes:owner>
<itunes:name>SFMOMA Web master</itunes:name>
<itunes:email>Web master@sfmoma.org</itunes:email>
</itunes:owner>
<itunes:category text="Arts"/>
<itunes:category text="Arts">
<itunes:category text="Visual Arts"/>
</itunes:category>
<itunes:keywords>SFMOMA, San Francisco, museum, modern, art, contemporary, visual, video cast, vodcast</itunes:keywords>
<itunes:image href="http://test.sfmoma.org/vodcasts/images/sfmoma_albumart.jpg"/>
<itunes:explicit>no</itunes:explicit>
<itunes:block>no</itunes:block>
<item>
<title>Brice Marden talks about his painting "Cold Mountain 6 (Bridge)" (1989-91)</title>
<description>Painter Brice Marden in conversation with former SFMOMA director David Ross, as they discuss his 1989-91 painting "Cold Mountain 6 (Bridge)"</description>
<link>http://test.sfmoma.org/vodcasts/2007/february/mov_BMarden_Cold.mov</link>
<enclosure url="http://test.sfmoma.org/vodcasts/2007/february/mov_mov_BMarden_Cold.mov" length="27962000" type="video/quicktime"/>
<guid isPermaLink="false">7D8FFCDD-201A-4C47-B7E1-14639B2A05D7</guid>
<pubDate>Thu, 1 Feb 2007 14:50:26 -0800</pubDate>
<itunes:subtitle>Brice Marden talks about his painting "Cold Mountain 6 (Bridge)" (1989-91)</itunes:subtitle>
<itunes:summary>Painter Brice Marden in conversation with former SFMOMA director David Ross, as they discuss his 1989-91 painting "Cold Mountain 6 (Bridge)"</itunes:summary>
<itunes:duration>00:01:27</itunes:duration>
<itunes:author>Brice Marden</itunes:author>
<itunes:keywords>SFMOMA, San Francisco, museum, Brice Marden, Cold Mountain, David Ross</itunes:keywords>
<itunes:explicit>no</itunes:explicit>
<itunes:block>no</itunes:block>
</item>
</channel>
</rss>
Note that you will need to fill in details about the length of your film in the itunes:duration area of the xml file. An easy method to determine the length of your film is to open it in QuickTime Player and look under “Window>Show Movie Info”. Enter the duration as HH:MM:SS - 00:01:32 for 1 minute and 32 seconds, for example.
Place the XML file on your Web server.
v) Check it in iTunes
- Launch iTunes (version 4.9 or later) and select Subscribe to Podcast from the Advanced menu.
- Enter the feed URL - in other words, the pathname on the Web server where your XML file resides (for the SFMOMA site: http://www.sfmoma.org/rss/videocasts.xml”).
- Click OK. An entry for your vodcast should appear in the Podcast playlist within iTunes’ main window and the video will begin downloading to your computer.
- Click the Play button and the video will play in the small video window in the lower left corner of the iTunes window. Click on this window and the video appears in a larger, separate window. Click Control-click (Mac) or Right-click (Windows) on this window and choose Full Screen to view the video at full screen.
vi) Add your vodcast to the iTunes Podcast Directory
Adding your vodcast to the searchable iTunes podcast directory is a simple way to publicize your videos to the public. Although in this workshop we focus exclusively on vodcasts, iTunes treats all video and audio streams under the rubric of ‘podcasts’. Therefore, vodcasts will be listed under the iTunes podcast directory. The directory offers tens of thousands of vodcasts and podcasts, produced by both big names and independent creators. Luckily, both the ‘big” and ‘little’ guys get equal footing in the podcast directory.
To submit your vodcast feed:
- Go to iTunes>Music Store. Click on Podcasts under the iTunes Store. Under Learn More you will see a link to Submit a Podcast. The form is relatively straightforward. It is useful to keep your vodcast XML page open, and copy and paste the data directly into the form.
vii) Next Steps: Broadcasting Your Videos on YouTube.com
For some time now corporations, the entertainment industry, and advertisers have recognized the power of user-generated video sites, of which the reigning king is YouTube (http://www.youtube.com).
Increasingly, non-profits and cultural institutions have realized the potential of YouTube as a cost-free way to share content with a wide audience. Yerba Buena Center for the Arts (http://www.youtube.com/profile?user=ybcavideo) has designed a YouTube ‘channel’ featuring a variety of media related to their current exhibitions and public programs. Users can play back streaming videos or subscribe to the YBCA video stream and get alerts as new content becomes available.
This is a relatively simple, efficient, and exciting way for museums and cultural institutions to reach wider audiences, and perhaps win new converts!
Cite as:
Dance, K. and S. Pau, Vodcasting: 5 Easy Steps To Film An Interview And Get It On-line In A Day!, in J. Trant and D. Bearman (eds.). Museums and the Web 2007: Proceedings, Toronto: Archives & Museum Informatics, published March 1, 2007 Consulted http://www.archimuse.com/mw2007/papers/dance/dance.html
Editorial Note